part II
1/14/2001
This is a continuation of my forge-building saga. It's on a new page because of the pictures.I didn't want to burden the casual browsers with the pic downloads, even though they're only thumbnails.Clicking on the thumbs will bring up a higher resolution image.And if you made it to this page without first seeing what led up to here, you can check out Chapter I here.
Now on with the saga.As we last left the story, our hero had just completed his (my) first burner and had gotten it to burn a nice, consistent, flame. Then came the holidays, a son home from college, and a honey-do list a mile long. Well, the holidays are over, the decorations put away, kids back in school, and a serious chomping off the list. Time to get back in the shop.
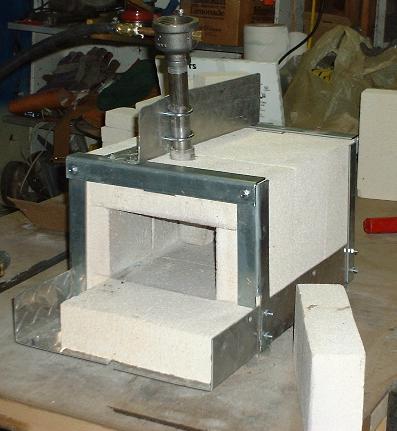
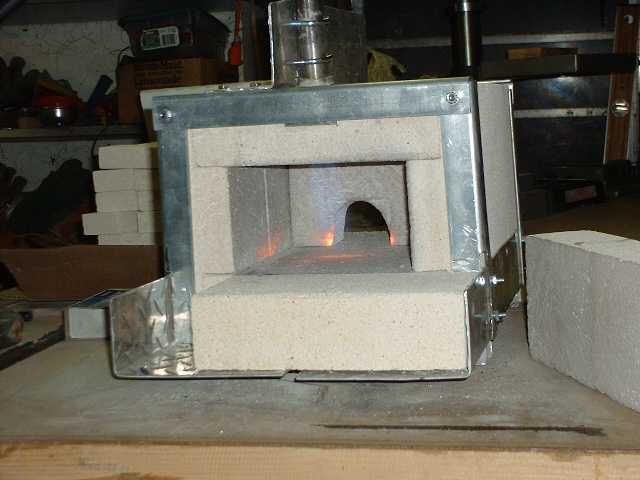
All that was left was putting a frame around the fire-brick forge.I planned to build the frame out of angle iron and went to the scrap yard to find just that. Something better came across, though.I found some aluminum diamond tread running board.The size and shape looked perfect for the bottom part of the frame, adding a tray in the process.And at $1 per pound, I figure it was a lot cheaper than store-bought angle. The rest of the frame was put together, dry-fit to the bricks, the bricks coated with ITC-100, and the following was the result.
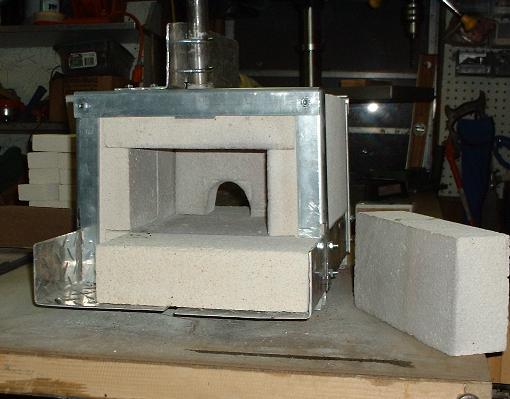
Two views of the completed forge.The one on the right shows the rear wall, which is also movable.I can slide it in to use up less space, and fuel, if not needed.The lone brick on the right is my "door".
Basically, the tray is made of two pieces of the running board, cut lengthwise to give me the width I needed. The cut-off became a U-shaped channel, used by the running board for strength. I used this to connect the two tray halves together. I also cut the tray long enough to use another brick as a front "hearth".From my classes, I found it was easier to drag small pieces out of the forge onto the hearth and then pick them up with the tongs.
You can also see that I used some more of that running board to mount the burner.It also holds the front and back angle-iron frames, which complete the frame. The burner is mounted with 3/4" pipe U-bolts.
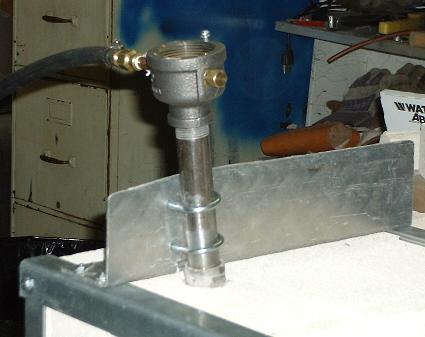
Close-up of the mounted burner. You might notice a slight angle to the burner and also (from previous pics) that the burner is mounted to the left of center. Ron Reil suggested both of these. The off-center position is to give me a hotter "sweet spot" where I'll most likely be working the metal. And the angle is to aim the flame slightly to the rear to keep it out of my face.None of these measurements is critical and is therefore not recorded. Kind of like my wife's meatballs - and they turn out great!
To drill the hole in the brick for the burner, I followed the method presented by Jim Riser, whose web site gave me the idea to build the forge out of bricks in the first place. Basically, I cut some notches in the end of a 3/4" pipe, loosely mounted it in my U-bolts, and drilled away. Then I carved out the hole to fit the flared burner nozzle.
This exposed a miscalculation, though.I forgot that the flared nozzle would stick out of the brick by about 1/2". The added thickness of the nozzle interfered with the burner mounting plate.A better way would have been to put spacers between the plate and burner tube.To fix this, I notched the plate where the flare interfered.
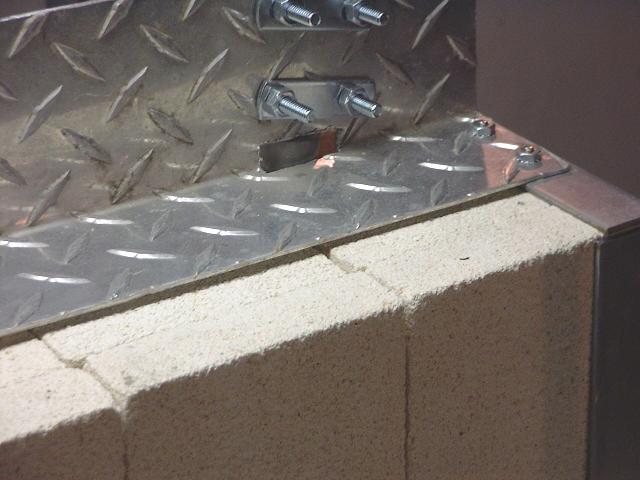
Close-up of the oops (and a darned nice illustration of the other side of my burner mounting plate).
OK, so now everything is put together, the burner gets hooked up, and my heart starts pounding as I turn on the gas and see if all these hours are fruitful.
Initially, I only got a very weak burn. Luckily, I noticed that, in connecting the propane hose, I had inadvertently knocked the jet out of alignment. So all that work in using the water stream method was pretty much undone. However, it wasn't out too far and a simple twist of the jet tube got my lovely propane flame roar. Oh, one other thing - I've got to find a less exciting way to light the flame.I used one of those long-stem butane lighters.The rush of flame that came out pretty much burnt off most of the hairs from the top of my hand.A simple lit match in the bottom of the forge just gets blown out when the gas is turned on. Just a minor technicality that I'll soon figure out.
Anyway, once I got the jet aligned, I just stood and watched the inside of my new forge glow.Boy, did that feel good!!!
This shows the initial heating of the forge. One interesting thing - notice the small orange spots.Because the brick is not smooth, the ITC-100 missed a couple small places.The orange spots are the exposed brick heating up before the ITC gets hot.Anyway, the flash of the camera doesn't give a good representation.Read on.
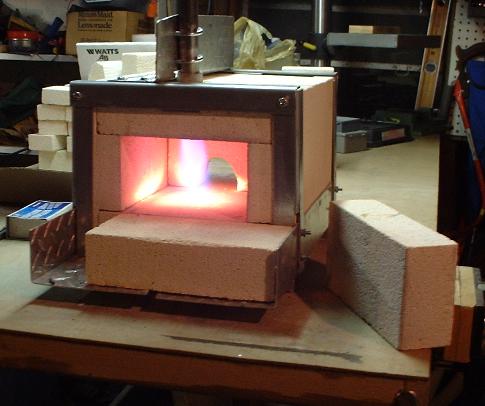
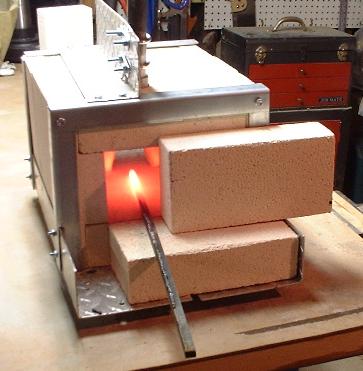
Here we go.No flash and lots of real nice flame. I'm running about 5 PSI here, but the flame holds well down to 1 PSI and gets really exciting at 25 PSI.Now the ITC is getting warm.At this point, the outside of the fire-brick is still cool to the touch.I do see some smoke leaking through the seams between the bricks. The top front angle-iron is getting hot, but the rest of the metal is just a little warm.
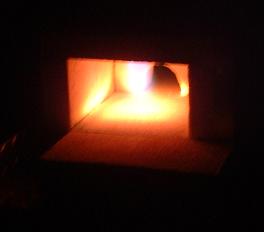
I really like this picture.I turned off the lights and left the flash off.It was worth stumbling around the garage for this.
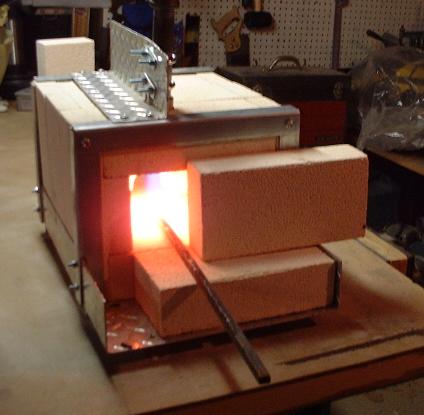
Here it is - the fruits of my labor.This made it all worthwhile.I had that piece of 3/8 stock glowing orange in about 45 seconds.You can also see the door in place.I put a brick behind the forge in case any hot gas escaped out the back and burned down my shop. That wasn't needed though.My back wall is about 1/2 way into the forge and very little heat came out the back.
Also at this point, about 10-15 minutes of heat, the top and sides of the brick is still cool to the touch. The front frame, though is hot enough to burn skin.Another interesting thing - When I fired up the forge about 10 minutes later to show my son (he thinks good ol' Dad is getting a little extreme in his old age) the bricks felt warm.It seems as if it took some time for the heat to transfer through.
One last picture (for now). The forge is turned off, but the stock is still glowing.No real information here, just another picture I liked.
I do have one concern about the fire-bricks. They're easy to cut and all, but I think just random vibration might cause them to wear against each other. Time will tell.
So what's next? The biggest challenge of all - I've got to find room for all this.I want to mount the forge on a rolling cart of some sort. A discarded gas grill would be great, but I haven't found one yet. Got to make more frequent trips to the scrap yard.
Next, I'll re-plumb it to add the idling manifold. I've got most of the pieces.
But for now, I'll move things around enough to get to hammering.I think my childhood is much more fun the second time around.
(2/4/2001)
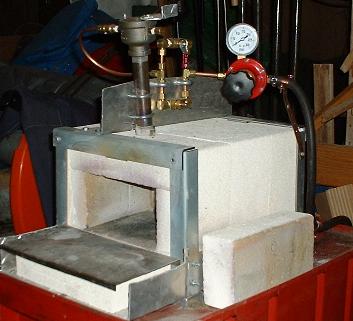
Made a couple changes to the forge. First, I added the gas-saver manifold.
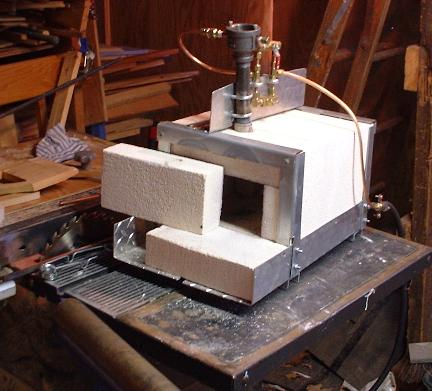
Here's the forge with its gas-saver.
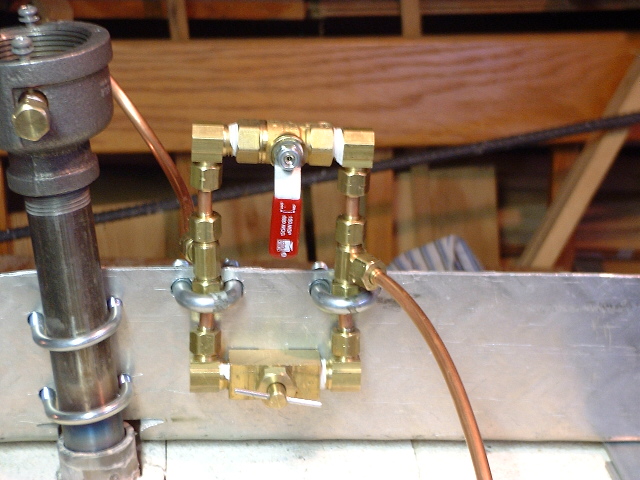
And the close-up. It took some finagling to figure out all the pieces. I was hoping to use solder fittings for the T's, but they didn't exist, at least at Home Depot. Also, they didn't have enough straight 1/4 compression - MPT couplers, so I used right angle ones. This changed the shape of what I had planned, but it's probably more compact this way. It seems as if every time I go to the hardware store, I spend more time than expected mixing and matching all different fittings. I can think of worse place to spend my time, but I must remember to never head out 15 minutes before closing.
(05/19/2001)
OK, it's been some time since the above pictures. First, a concern - The
firebricks have developed some cracks. The worst is shown below.
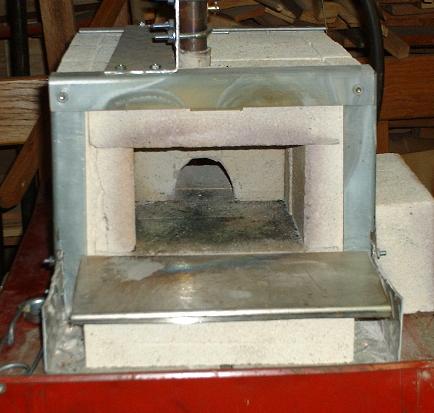
You can see the left vertical brick split. It's still very much intact and holds up the ceiling just fine. But I patched it with firebrick mortar anyway.There are also some cracks in the ceiling brick and in the back wall. Nothing falling down, though.
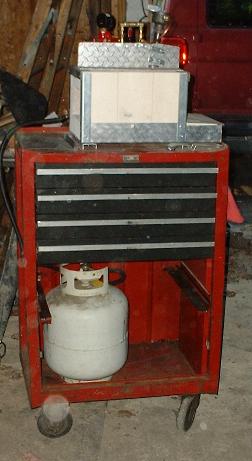
Here it is, my forge cart. I tried the barbecue grill thing, but it was too low.My neighbor had a yard sale and was getting rid of this tool cart. The height is perfect, and it has drawers for my smithing tools. I took out the bottom drawer to fit in the tank, and now I've got a portable forge.
The cart necessitated a replumbing, as shown above. I don't know if it'll make a difference, but now there's less tubing, and the regulator is close to the burner.
-Marc