Following the plans for building forges from Ron Reil's
Forge Page, I decided to enter the world of high temperature. The following
is a blow-by-blow description of this adventure. Clicking on each picture
will bring up a bigger, higher resolution, picture.
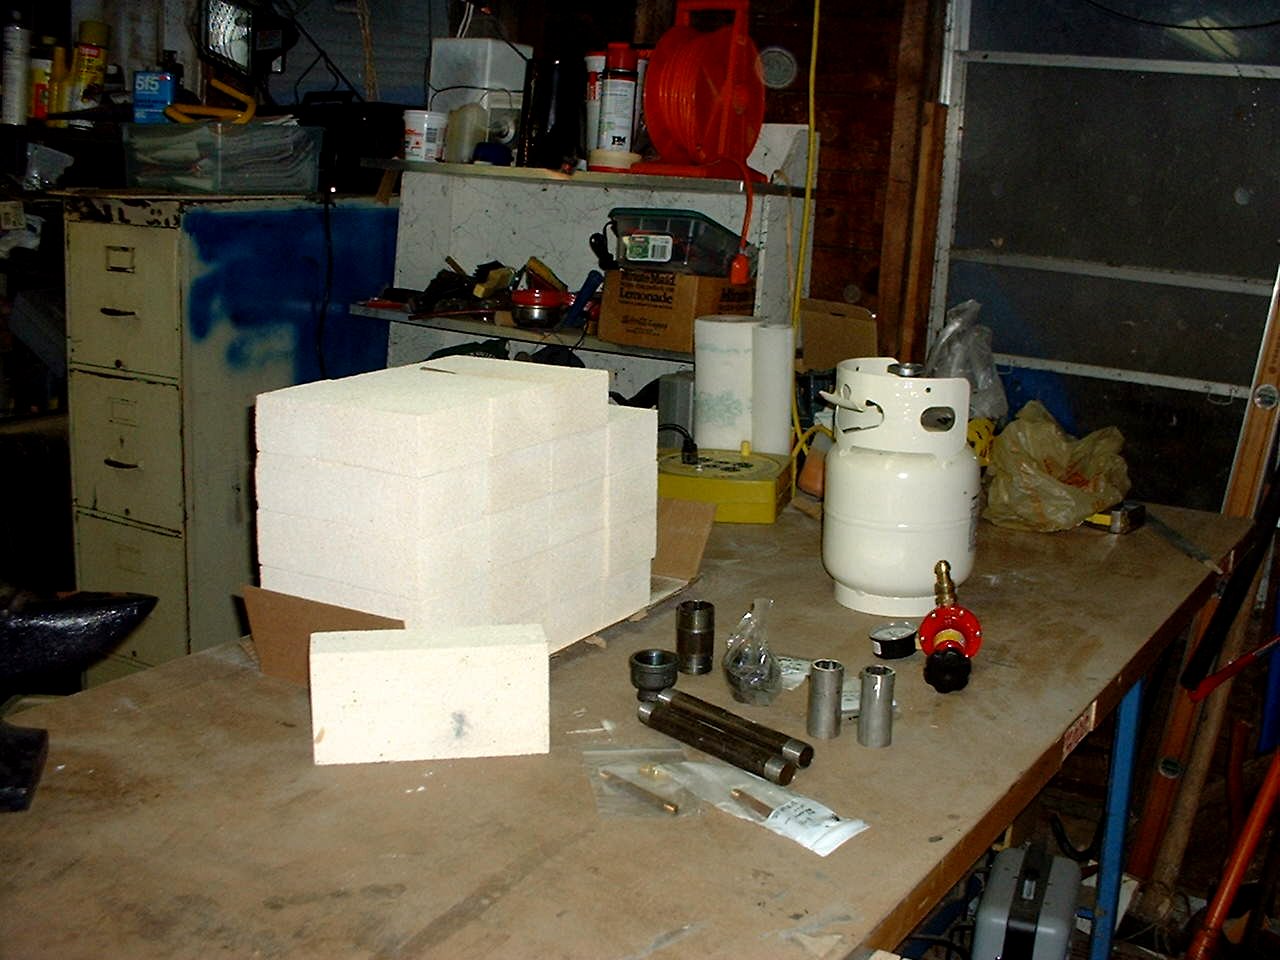
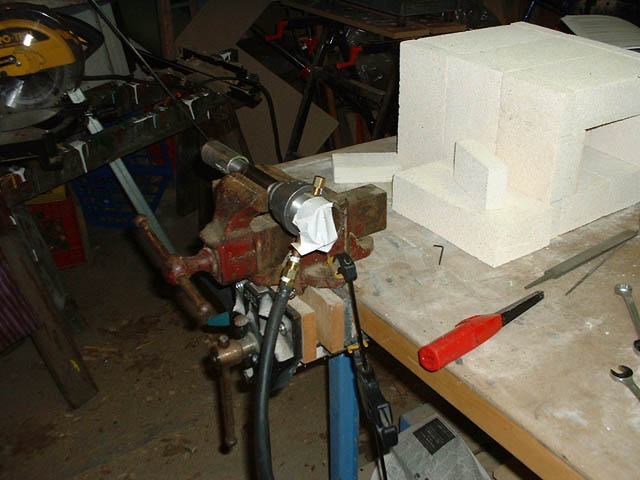
Here's my forge "kit":
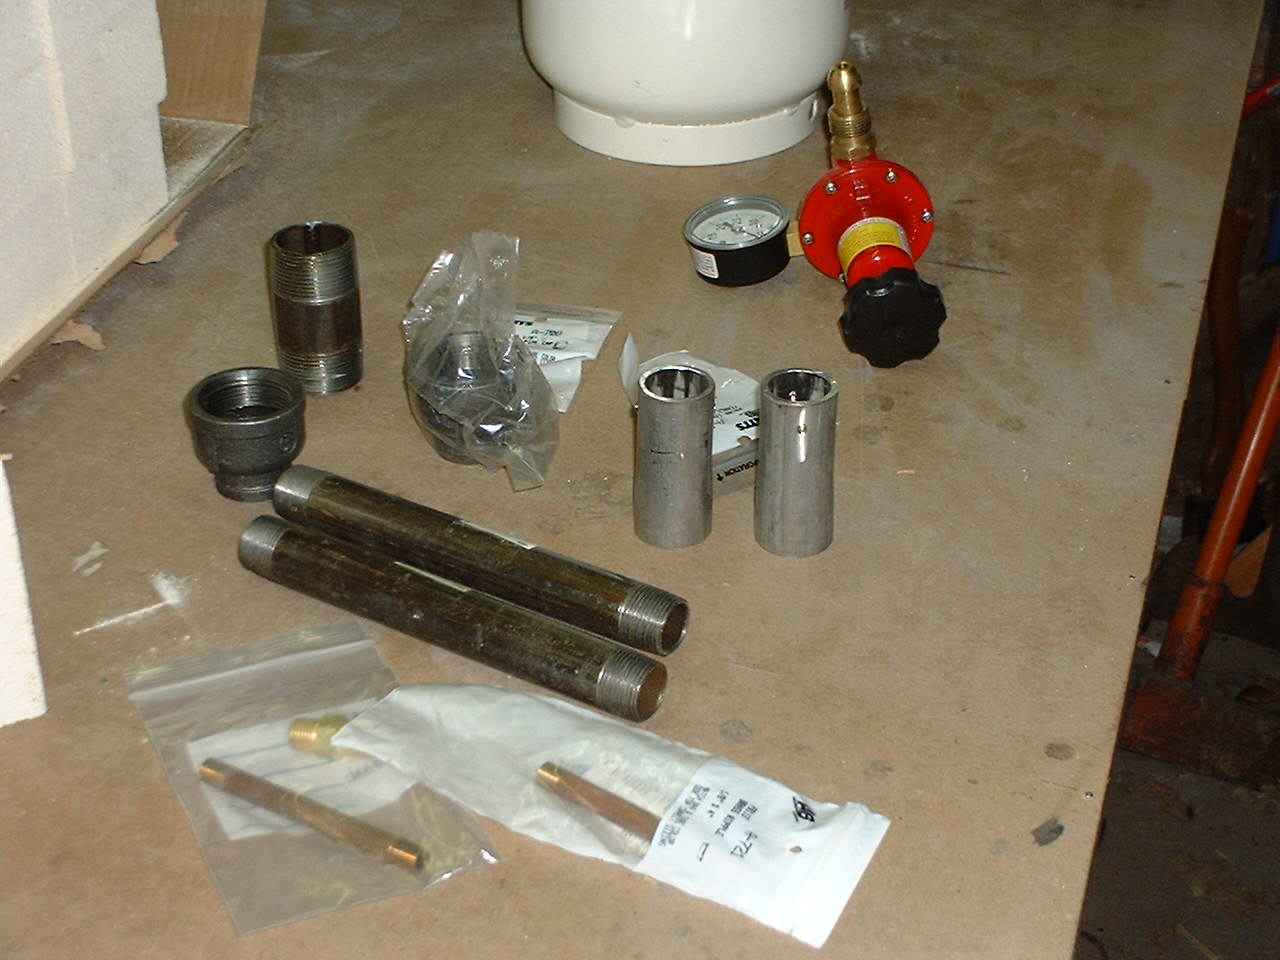
and closeups of the plumbing:
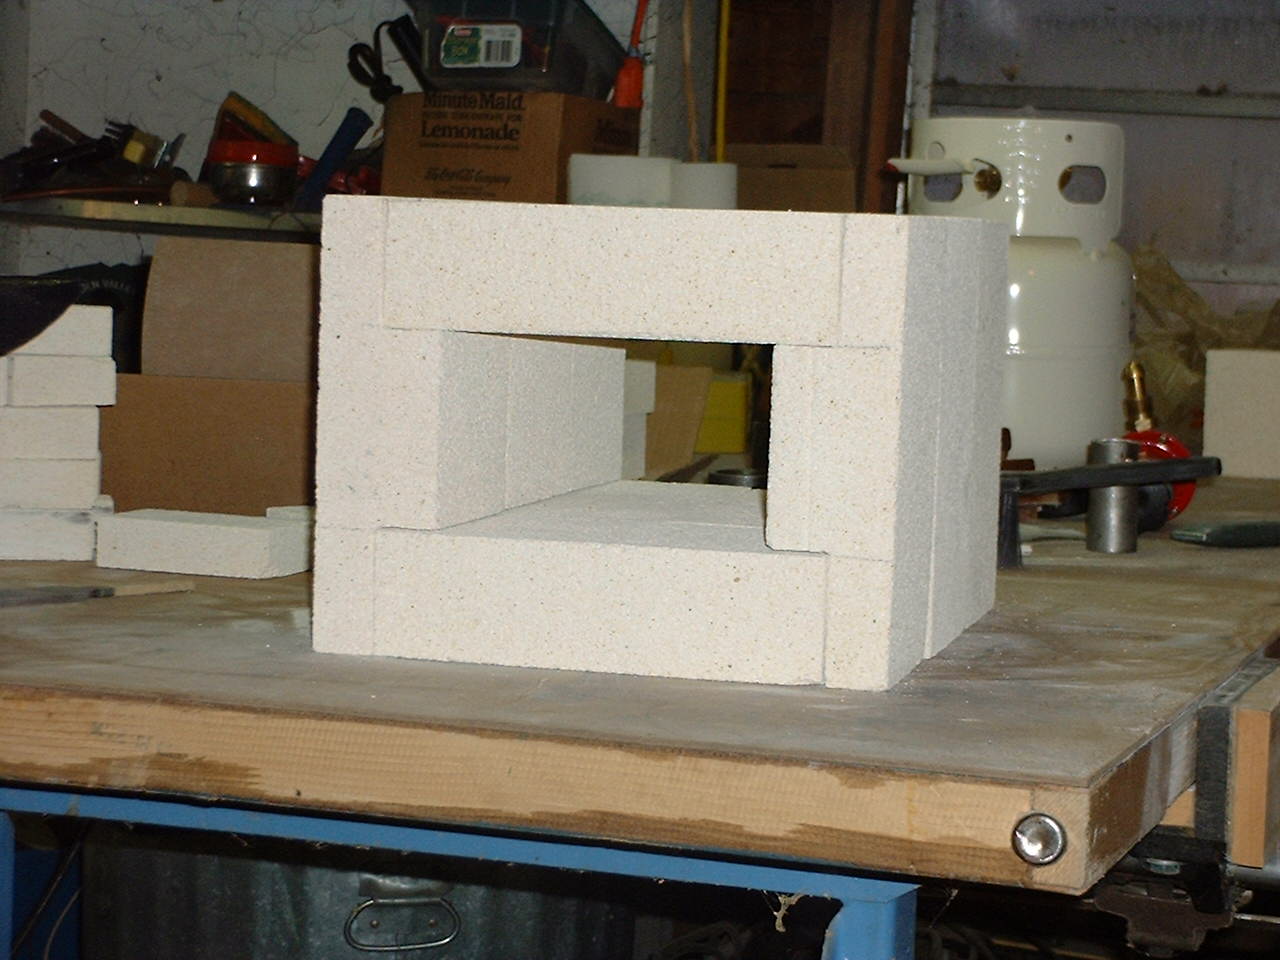
The white block is the stack of insulating firebricks, made by New Castle Refractories. I used bricks rated for 2800 deg F. For me, this was the least expensive way to go. The firebrick gives me the insulation I need plus the structure itself. Plus, I didn't have to make a tube, which would have required metalworking tools and skills that I don't have yet.
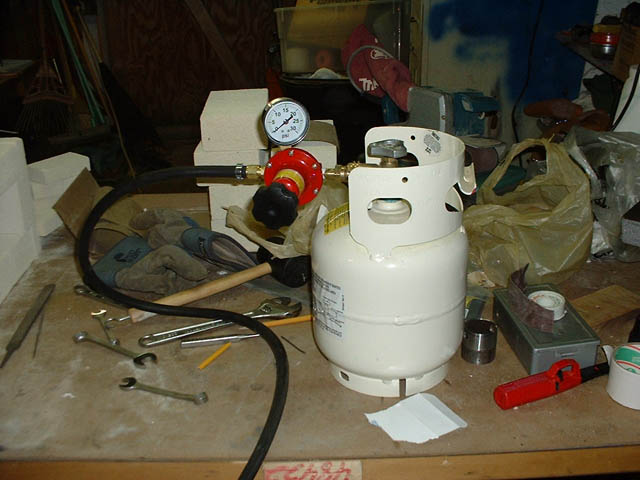
The propane tank is my little 5 lb tank I use for camping. It was more convienent to use this small one for testing purposes. Also in the pic are the burner plumbing supplies. There are actually parts for two burners there. That stuff is inexpensive enough to get enough for two, just in case I need two burners to get hot enough, or for spare parts.
The regulator and gauge I bought from Centaur Forge. They sell lots of blacksmithing supplies and the Fisher regulator and gauge are replacement parts for several of their forges.. But after I found out about Jay Hayes, I would have been a little better off buying through him. His prices were lower and he also sells just about everything you might need to build a tube-type forge. I am getting my ITC-100 refractory coating from him.
The flared nozzles I bought pre-made from Larry Zoeller. You can check out his web page for more info.
Missing are the frame (angle iron) and stand (probably a retired gas grill if I can find one).
Here's the forge structure concept:
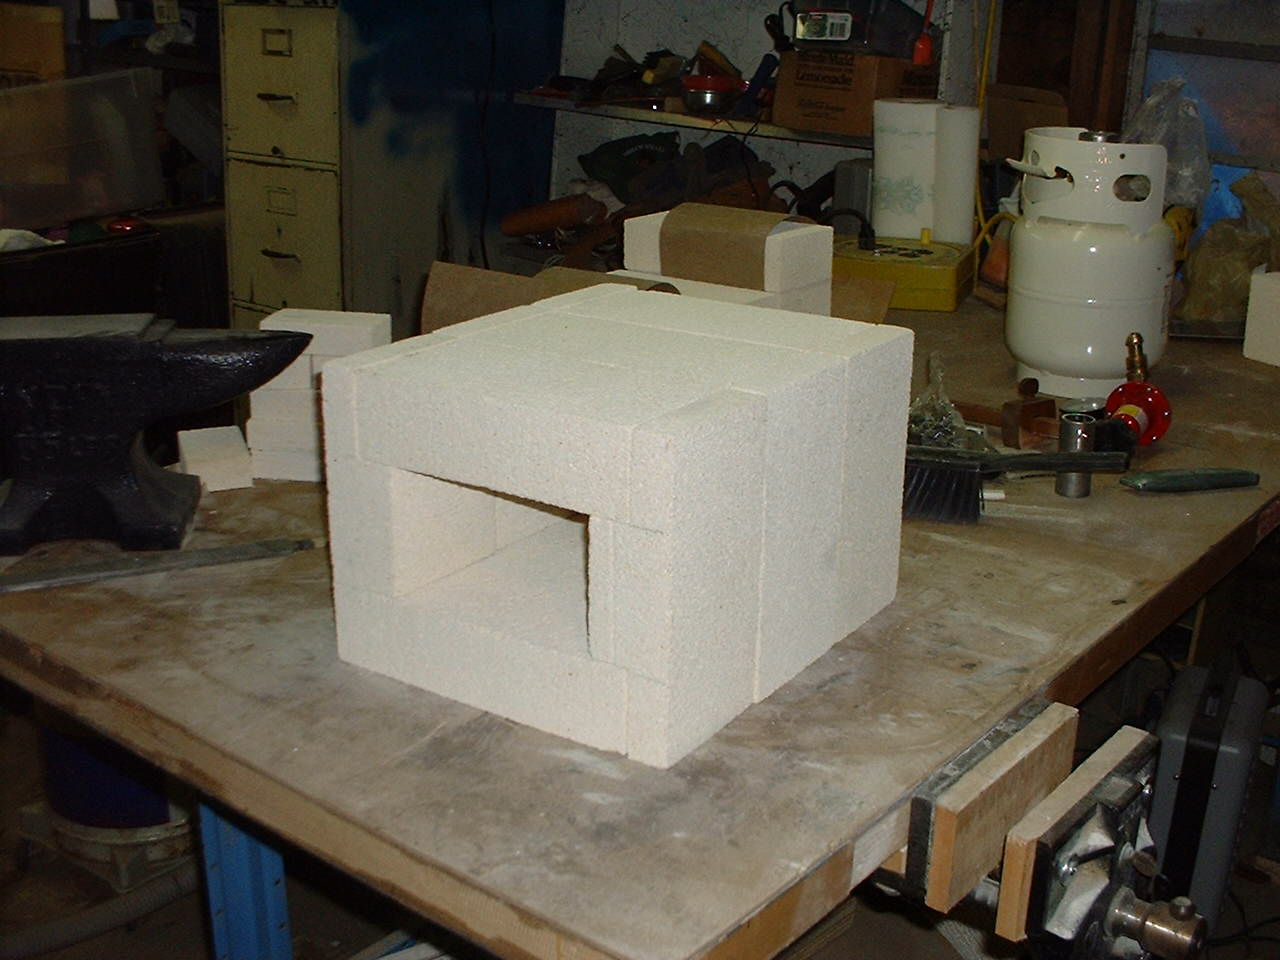
And an exploded view, showing the construction more clearly:
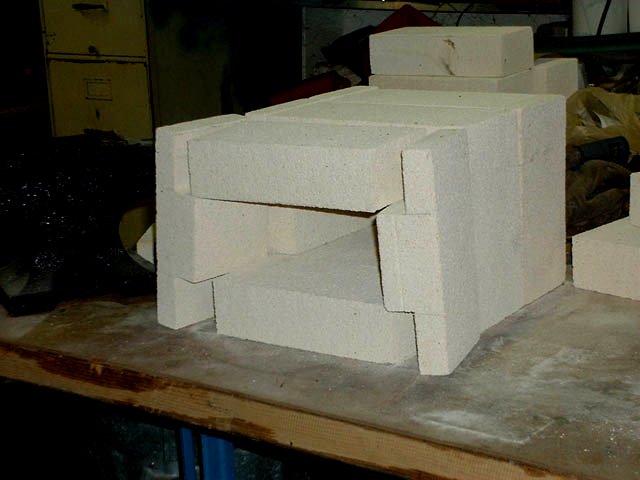
(although, I'm hesitant to use the term "exploded" for a propane-based device.) Otherwise, the forge is basically 3 brick "donuts". I'll put in a back wall, with cutout for long pieces and gas exhaust, plus a sliding front door made out of firebrick.
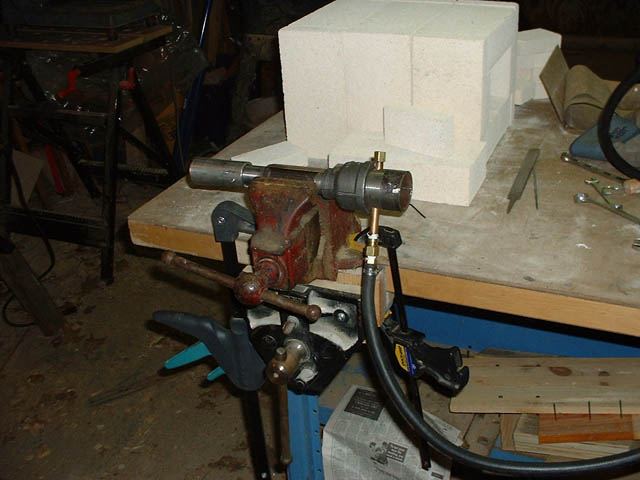
Next the burner. This is built per plans found on Ron's Forge Page. I'll also include my modifications and the reasons why I should have left well enough alone.
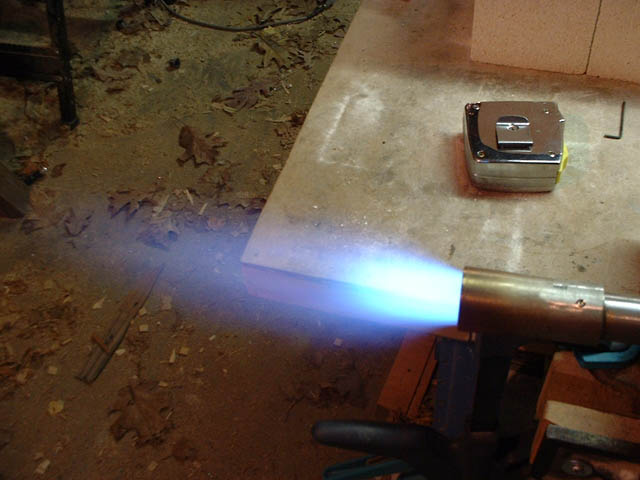
Here's a pic of my first attempt:
And the flame it produced:
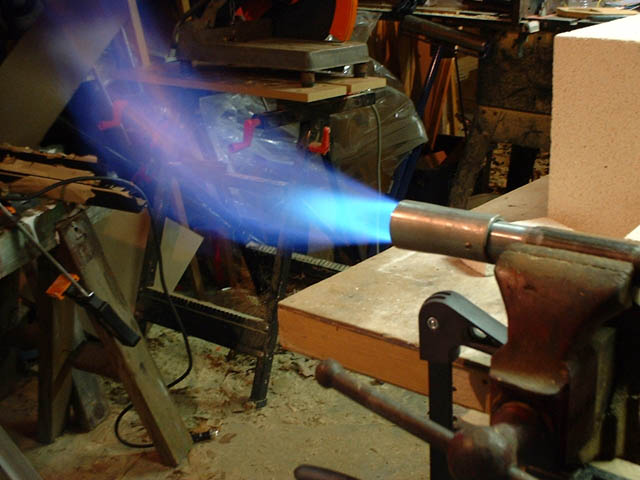
Notice how the flame curls upward, indicating unburned gas from the nozzle of the burner. Also, in order to get even this pitiful flame, I had to choke off the air intake area by about 2/3's. Another sign is the total length of the tube. The distance from the small end of the reducer to the business end of the nozzle shouldn't be less than 9". It looks pretty short in the picture. The picture didn't lie - it's about 7", probably because the screwed-up jet forced me to tune the nozzle that short.
Anyway, here's the choked intake. I originally used my hand, but turned
to Red Green's favorite substance, duct tape, to give me both hands for
adjustment.
Highly inefficient, and probably not going to sustain any decent heat.
After Ron took a look at these pics, he immediately noticed my method of burner installment. Instead of putting the 1/8 nipple (the jet tube) into the bell reducer, I put it in the locking nipple. This places the gas jet too far away from the burner tube.
Next, I placed the jet tube where it belongs, in the reducer, and used the locking nipple he way I'm supposed to. This didn't cure the problem, though. Same old flame and same old choke. We tried to figure out what could have caused the problem, surmising that maybe the jet hole wasn't clean.
Then I tried one more thing. Since I used the same locking nozzle, it still had the holes from the original jet tube. I figured (wrongly once again) that since the Reil burner also works using set screws to hold the jet tube, instead of any locking nipple, it wouldn't matter if there were holes there. Now maybe those extra holes cause some weird turbulence or something, but after I taped them up, the burner worked like a charm.
One other thing about this burner is it's got to be below 3psi to light it. Or you can cover the intake half way with your hand until it catches. Once it catches, it burns real well. I can run the pressure down to its lower limit, < 1psi, and it still stays lit, although with some sputtering. Choking helps the low end.
12/24/00 - I'm going to start dating my entries. It's more like a journal this way.
I put the burner on another tank and didn't get great results. As I turned the pressure up, the flame went out. I could re-light it, but I couldn't get a nice operation up and down the pressure range. Time to look more into it.
I tried the water method of aiming the jet as per Garry Jackson's idea and detailed in the FAQ on Ron Reil's site. Since I live in NH, and this is Christmas Eve and all, doing this outside would present a problem. But I've got a hand-held showerhead. The hose terminates with a 1/2" IPS, which I take to mean Iron Pipe. It was easy enough to find a bushing that connects my 1/8" jet tube to the 1/2" shower hose.
This is easily one of the best ways to aim the jet. By staring down the back of the burner, you can see the exact angle of the jet stream. In my case, I found that it was veering off at an angle that I couldn't easily adjust. The problem was the holes for the jet tube in the reducer were not perpendicular to the burner tube. To fix, I either have to :
I chose door #3. The first reducer was drilled by carefully measuring the distance from the lip of the reducer and drilling two holes from the outside. I no longer trust the construction of these reducers, so I did something different. I installed the reducer on the burner tube, put the tube in a drill press vise, and squared the tube with my drill press. Then I drilled straight through the reducer, making sure I was also drilling through the diameter of the reducer. I also switched to securing the jet tube with set screws. Drilling and tapping for set screws is easy enough in this material, and the tap bits are only about $2. A tap wrench is about $5, but I already had one for a completely different purpose - makes a nice drill bit chuck for hand drilling in really tight quarters.
It's back in the shower I go. This time, though, I think I'll leave
my clothes on and work from the outside (just kidding). Anyway, I now
have a nice stream shooting about as straight as I can detect down the barrel
of the burner. I'm anxious to try it out for real, but my son is arriving
from Germany in about an hour. If I go in the garage now, I may as
well bring my sleeping bag and a change of clothes, as my wife will make
sure I'll be living there for a while.
1/14/2001
No picture after the final alignment, but I now get a great, sustainable, clean, burn. Now on to part 2...